<Previous Page – 2 of 4 – Next Page>
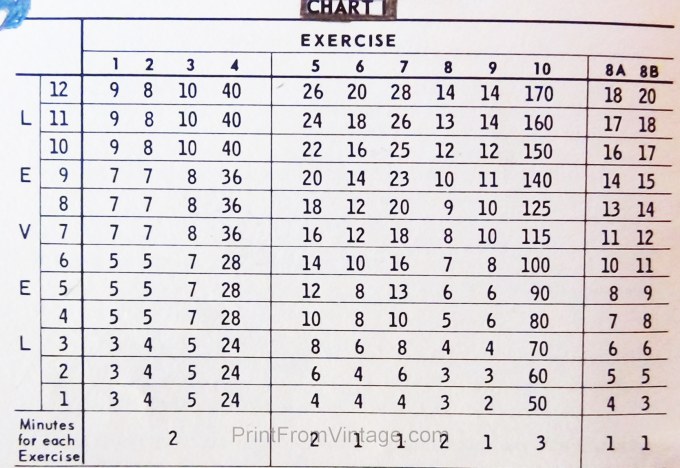
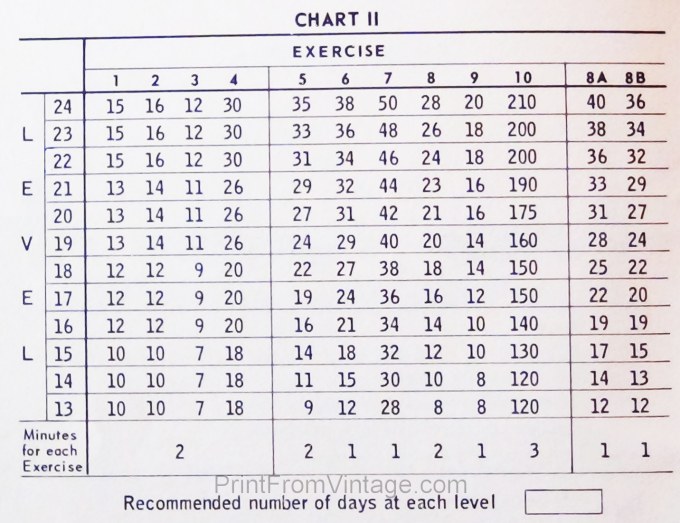
Chart 2:
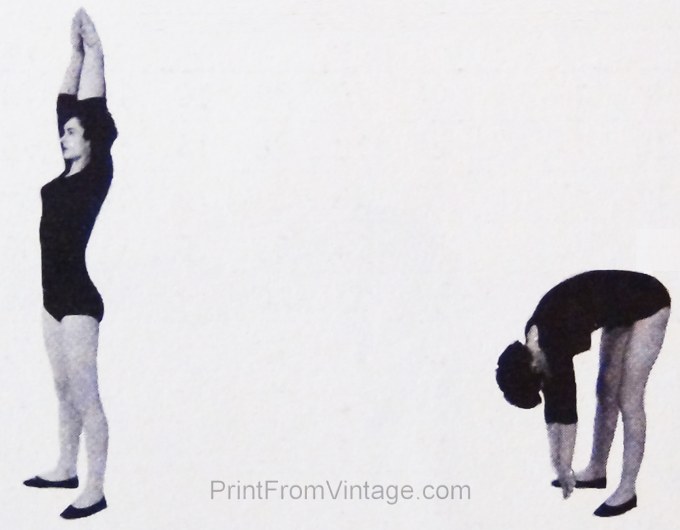
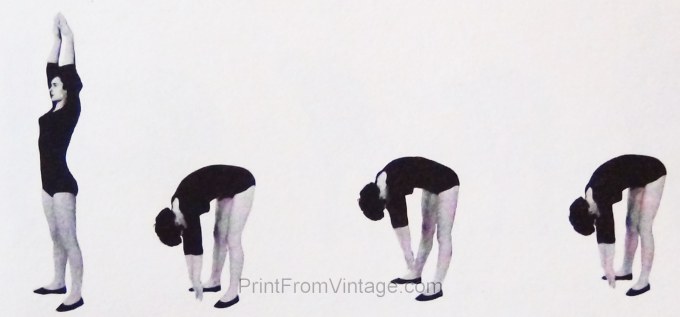
Exercise 1 – Toe Touching
Start. Stand erect, feet 12 inches apart, arms over head. Bend forward to touch floor between feet. Bob up and down touching floor a second time. Return to starting position.
Count. Each return to starting position counts one.
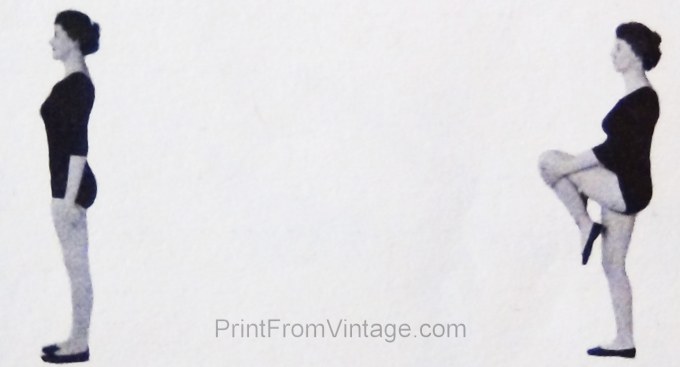
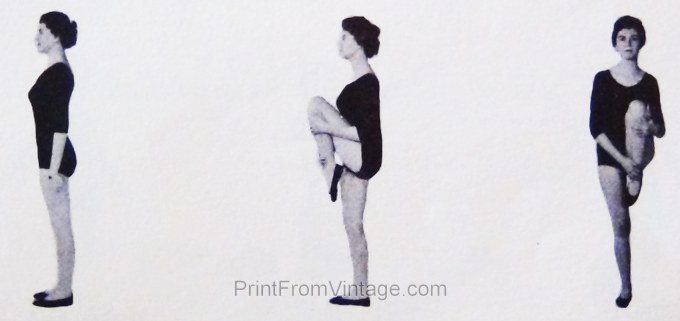
Exercise 2 – Knee Raising.
Start. Stand erect, feet together, arms at sides.
Raise left knee as high as possible grasping knee and shin with hands. Pull leg again body. Keep back straight throughout. Lower foot to floor. Repeat with right leg. Continue by alternating legs – left then right.
Count. Left and right knee raises count one.
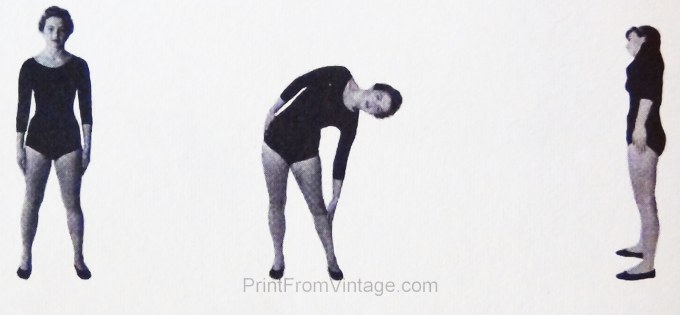
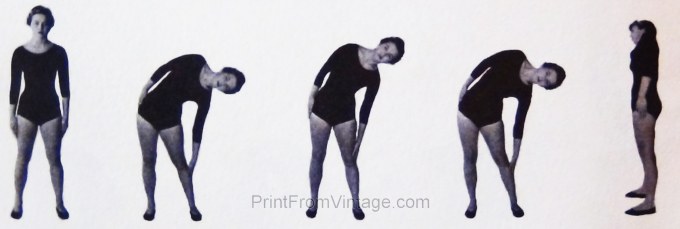
Exercise 3 – Lateral Bending.
Start. Stand erect, feet 12 inches apart, hands at sides.
Keeping back straight, bend sidewards from waist to left. Slide left hand down leg as far as possible. Bob up a few inches and press sidewards and down again. Return to starting position and repeat same movements to right side. Continue by alternating to left then right.
Count. Bends to left and right count one.
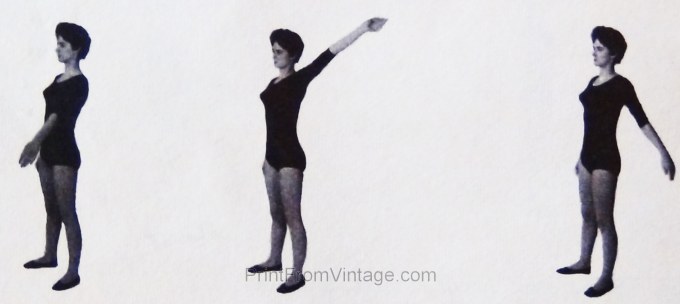
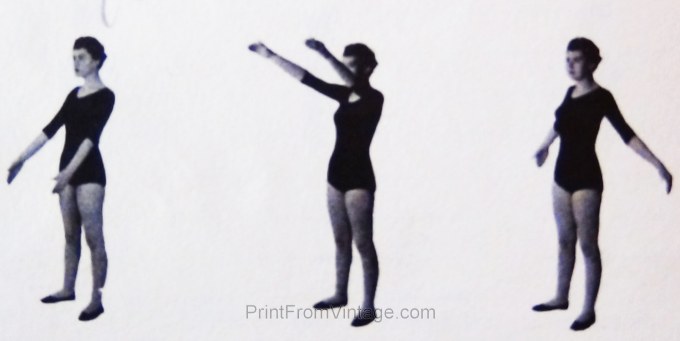
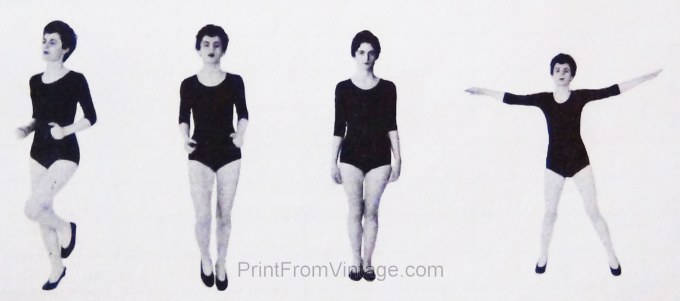
Exercise 4 – Arm Circling.
Start. Stand erect, feet 12 inches apart, arms at sides. Make large circles, with both arms at same time, backwards and around. Do half the number of repetitions making backward circles and half making forward circles.
Count. Each full arm circle counts one.
Exercise 5 – Rocking Sit-ups.
Start. Lie on back, knees bent, feet on floor, arms extended over head. Swing arms forward and at same time thrust feet forward and move to sitting position. Reach forward, trying to touch toes with fingers. Return to starting position.
Count. Each return to starting position counts one.

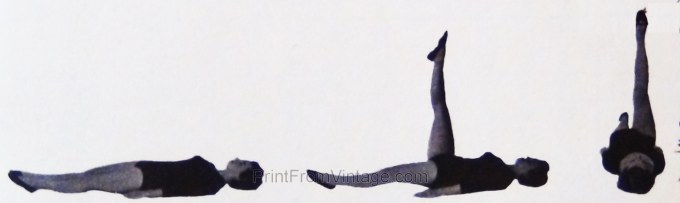
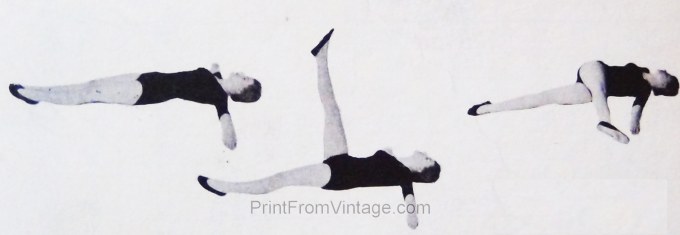
Exercise 6 – Chest and Leg Raising.
Start. Light face down, arms along sides, palms pressing against thighs. Raise head, shoulders, and legs as high as possible from floor. Keep legs straight. Return to starting position.
Count. Each return to starting position counts one.

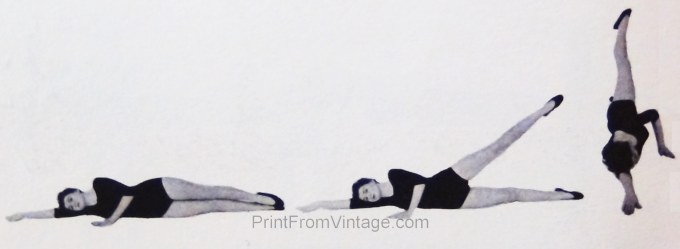
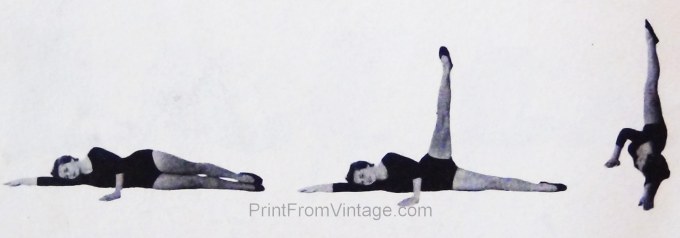
Exercise 7 – Side Leg Raising.
Start. Lie on side, legs straight, lower arm stretched over head along floor, top arm used for balance. Raise upper leg until it is perpendicular to floor or as close to this position as possible. Lower to starting position.
Count. Each leg raise counts one. Do half number of counts raising left leg. Roll to other side and do half number of counts raising right leg.
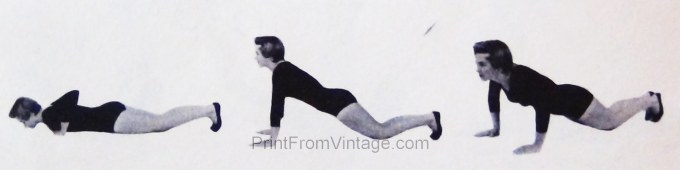
Exercise 8 – Knee Push-ups.
Start. Lie face down, legs straight and together, hands directly under shoulders. Push body off floor until arms are straightened. Keep hands and knees in contact with floor. Try to keep body in straight line.
Count. Each return to starting position counts one.
See 8a & 8b Supplementary Exercises at the bottom of this post.
Exercise 9 – Leg-overs.
Start. Lie on back, legs straight and together, arms stretched sidewards at shoulder level.Raise left leg to perpendicular. Drop it across body, and try to touch right hand with toes. Raise leg to perpendicular and return to starting position. Repeat same movements with right leg. Keep body and legs straight throughout, and shoulders on floor.
Count. Each return to starting position counts one.
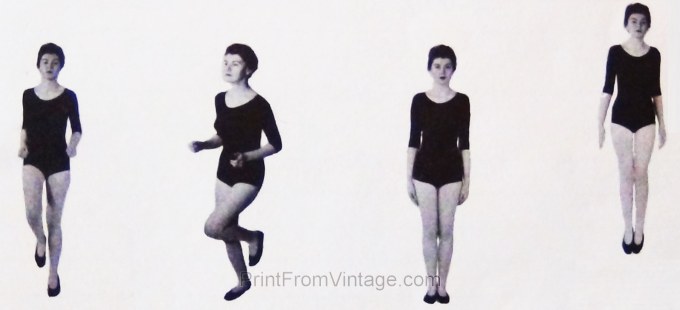
Exercise 10 – Run and Stride Jumping.
Start. Stand erect, feet together, arms at sides. Starting with left leg run in place raising feet at least four inches from floor.
Count. Each time left foot touches floor counts one.mAfter each fifty runs do ten stride jumps.
Stride Jump. Stride jump starts with feet together, arms at sides. Jump so that feet are about 18 inches apart when you land. At the same time as you jump, raise arms sidewards to shoulder height. Jump again so that feet are together and arms are at sides when you land.
Ready to progress to the 3rd Chart? Click here!
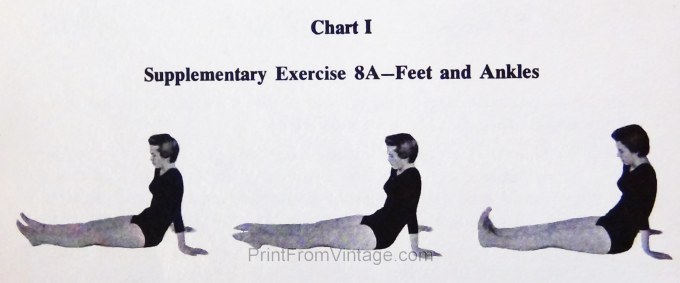
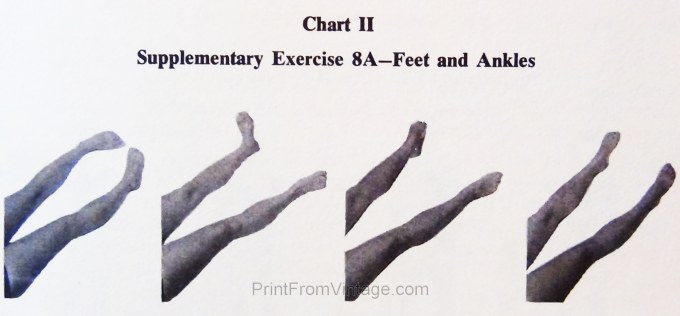
Supplementary Exercise 8a:
Start. Sit on floor, legs straight and heels about 14 inches apart, hands behind body for support, feet relaxed. Move feet so that toes make large circular movements. Press out and around and in and towards the body. Do half number of counts moving toes in one direction, then reverse for remainder of counts.
Count. Each time toes describe a full circle counts one.
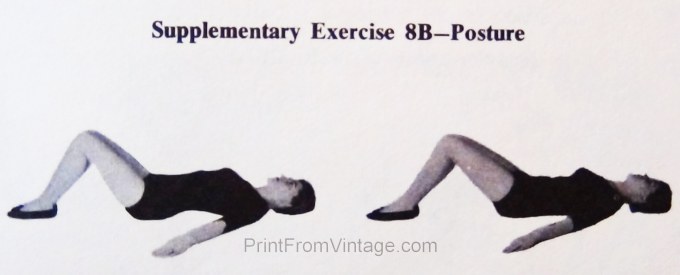
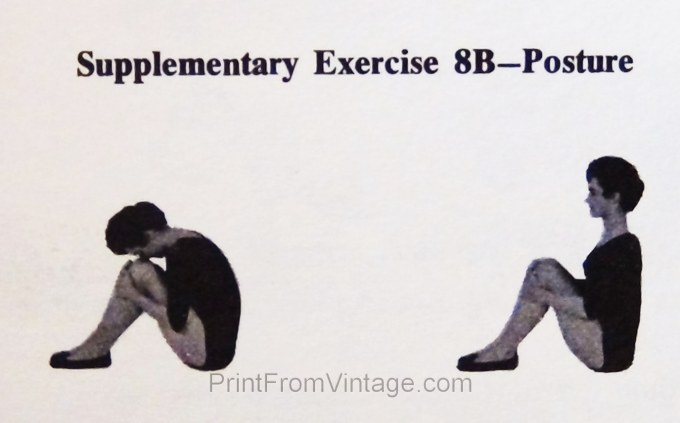
Supplementary Exercise 8b.
Start. Lie on back, knees bent, feet on floor, arms slightly to side. Relax muscles of trunk. Press lower part of back to floor by tightening muscles of abdomen and back. Relax to starting position.
Count. Each return to starting position counts one.